


 One of the biggest complaints about using Redux in a React application was how much boilerplate code and packages you had to set up each time you had to use Redux. Redux-toolkit addresses this problem by abstracting over and handling some common use cases while providing some utilities that can help you simplify your code. This article demos how to use Redux-toolkit together with react-redux hooks and sagas to build a simple marvel heroes app. You can check out just the TLDR section if you wish to only see additions from redux-toolkit.
TLDR
configureStore: abstracts over createStore and brings in some common middlewares used in redux by default (like redux-thunk) and sets up useful development tools like (Redux DevTools ext.) which can be enabled or disabled.
createAction: we usually would define our 'action types' separate from our action creator. createAction generates and returns an action creator function for the given action type string. So you don't have to define your types separately from your action creator functions.
// usually
const GET_DATA = 'GET_DATA'
function getDataOriginal() { return { type: GET_DATA } }
console.log(getDataOriginal()) // {type: "GET_DATA"}
// using `createAction` to generate the action creator:
const getDataNew = createAction('GET_DATA')
console.log(getDataNew()) // {type: "GET_DATA"}
- createReducer: allows you to supply a lookup table of action types to case reducer functions (so the name of the variable that holds the action creator function and the value passed to the reducer has to be the same), instead of writing switch statements. Also, it automatically uses the immer library to let you write simpler immutable updates with normal mutative code. you can do state.isFetching = true.
const getData = createAction('GET_DATA')
const counter = createReducer(initialState, {
  [getData]: state => state, //handle your state update logic here
 })
createSlice: accepts an initial state, an object full of reducer functions, and a "slice name"(a part of the general store), and automatically generates a slice reducer with corresponding action creators and action types. Didn't make a lot of sense? don't worry we will get to see how it works in the demo, just remember that createSlice combines the function of both createReducer and createAction, so with createSlice you don't have to use createAction and createReducer.
createSelector: from the Reselect library (a simple selector library for redux, improves performance by computing derived data), re-exported for ease of use.
There is also a createAsyncThunk () and createEntityAdapter utilities function, which I make mention of towards the end of the article.
DEMO
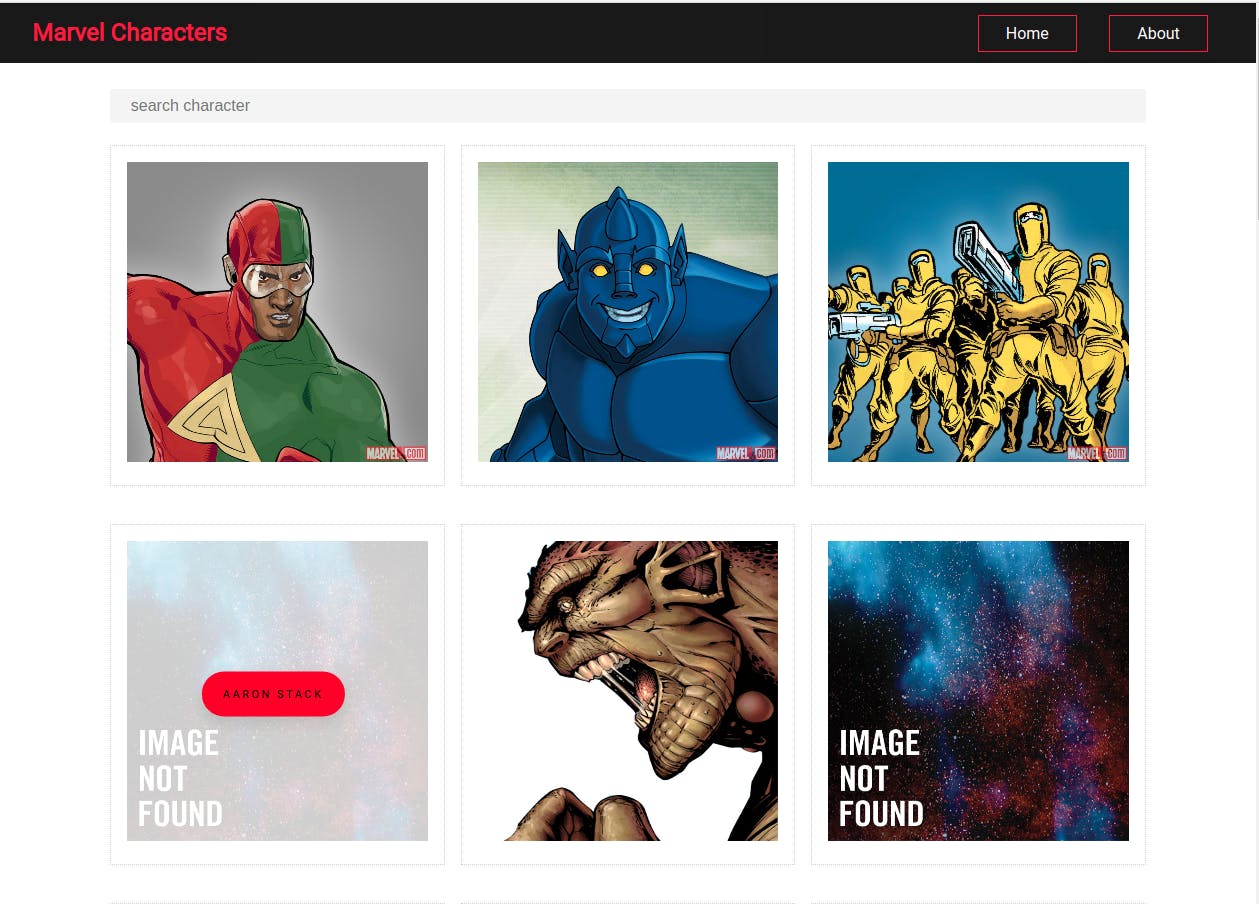
We are going to use the configureStore, createSlice, react-redux hooks, and sagas to build a demo marvel heroes app that looks like this
You can find the complete code for this demo, here (on the branch named redux). Also to run this project you will need to get a private and public key from marvel and store it in src/env.local as REACT_APP_PRIVATE_KEY and REACT_APP_PUBLIC_KEY.
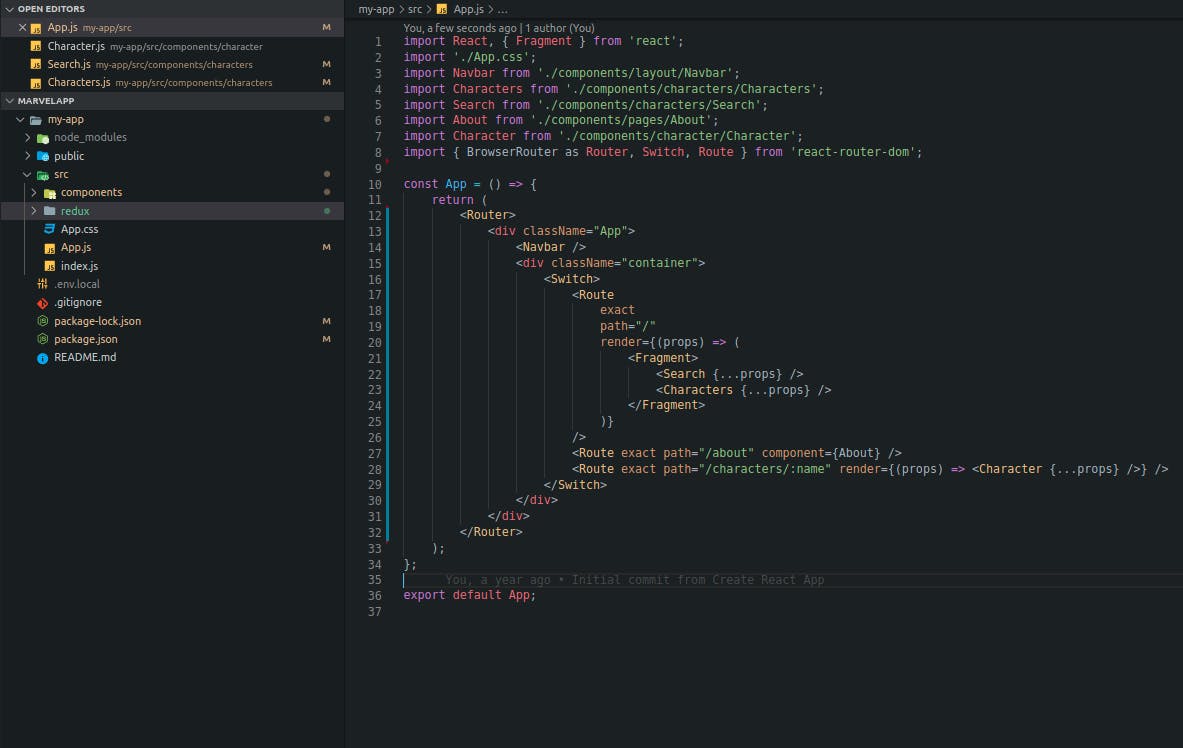
project structure:
The Marvel Heroes App consists of components and a redux sub-folder. All routes in the app are brought together in the App.js file. Our goal in this demo is to provide the Characters component with the current marvel characters in the redux store at each point in time while a search is being made and initially when the page is rendered.
Adding Redux using Redux tool-kit
We, Will, be adding Redux to our app in the following steps, this will enable us to get the updated marvel characters every time a user is making a search (an action is being dispatched).
updated folder structure inside Redux
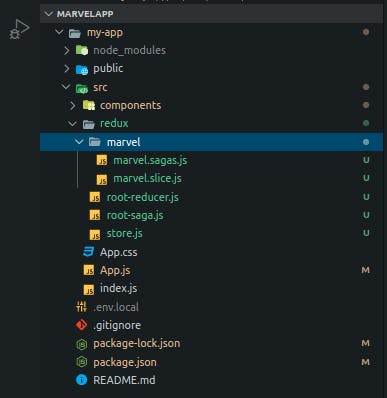
Inside our redux folder, we basically have our store.js, root-reducer.js, and root-saga.js. Then we would have other sub-folders which will be a "slice(sub-section)" of our state and will have its own slice file and a sagas file for handling asynchronous actions. For now, we just have the marvel sub-folder/slice which contains its own slice file and a saga file. In a larger app, you could have other slices of your application state like users, alerts e.t.c
1. Create our marvel slice: In the marvel.slice.js file using the createSlice function which accepts an initial state, an object full of reducer functions, and a "slice name", and automatically generates action creators and action types. It returns a "slice" object that contains the generated reducer function as a field named reducer, and the generated action creators inside an object called actions.
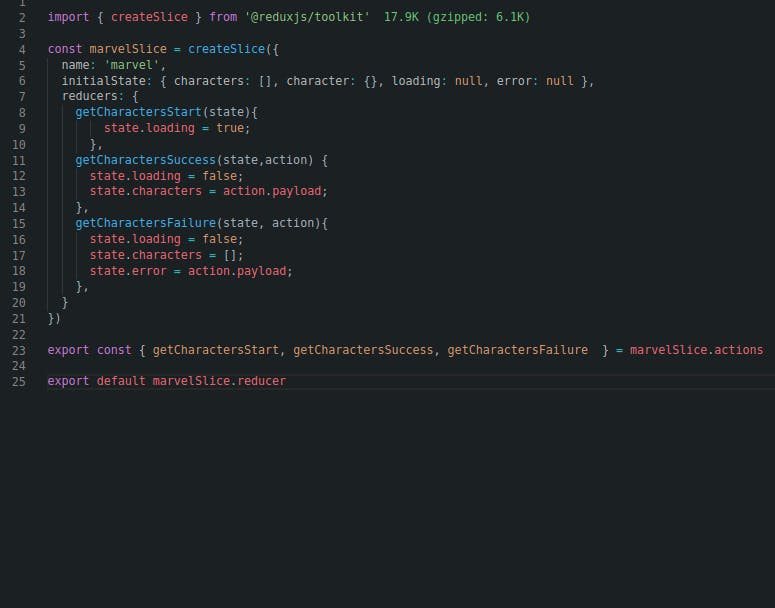
using the createSlice functions we were able to create our action types, action creators, and reducers for the marvel state. The process would have required much more boilerplate code and maybe separate files if we were just using Redux. Notice that we are mutating state also and not having to copy state every time we make an update. This is because immer library is being under the hood to let you write simpler immutable updates with normal mutative code.
next, we set up our marvel sagas that will be running and waiting for our marvel action creators to be dispatched.
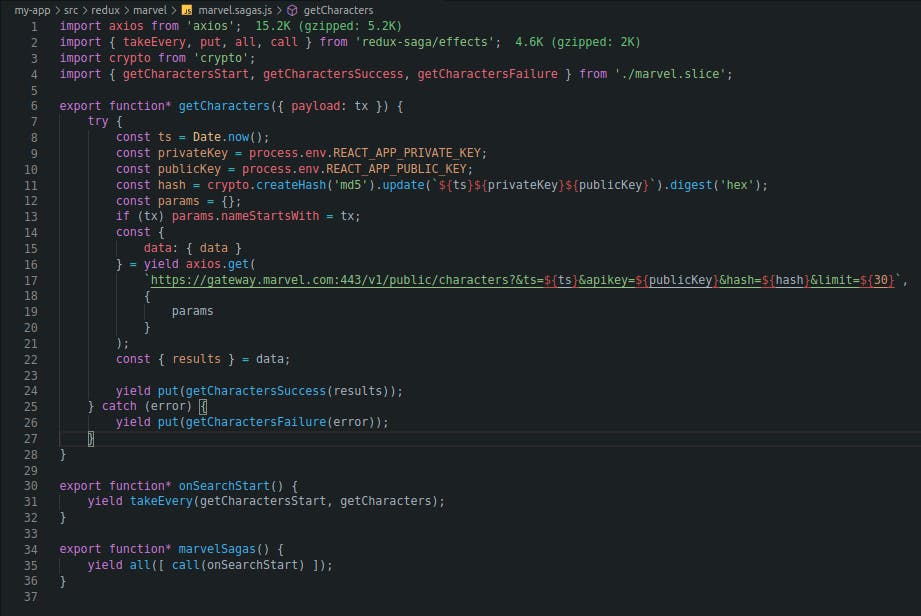
2. Set up our marvel sagas: In our marvel.sagas.js file, we will set up our marvel sagas which registers an onSearchStart saga that yields/execute a getCharacters generator function every time a getCharactersStart action is dispatched.
next, we set up the files where we are going to bring together our reducers, sagas, and set up our store.
3. Combining our reducers, sagas, and setting up Redux store: In larger applications, we would usually have multiple slices/sub-sections of our app, which all bring together in the root-reducer file for the reducers and root-sagas file for the sagas. We will also set up our Redux store and connect it with our application.
In the root-reducer file:
import { combineReducers } from 'redux';
import marvelReducer from './marvel/marvel.slice';
const rootReducer = combineReducers({
      marvel: marvelReducer,
});
export default rootReducer;
In the root-sagas file:
import { all, call } from 'redux-saga/effects';
import { marvelSagas } from './marvel/marvel.sagas';

export default function* rootSaga() {
  yield all([call(marvelSagas)]);
}
setting up our store: using configureStore we will set up our Redux store
import { configureStore } from '@reduxjs/toolkit'
import logger from 'redux-logger'
import createSagaMiddleware from 'redux-saga';
import rootReducer from './root-reducer';
import rootSaga from './root-saga';

const sagaMiddleware = createSagaMiddleware();
const store = configureStore({
    reducer: rootReducer,
    middleware: (getDefaultMiddleware) => getDefaultMiddleware().concat(logger,sagaMiddleware),
  })

sagaMiddleware.run(rootSaga);
export default store;
We configure our store with the root reducer and in addition to the default middleware, we added redux-logger and saga middleware.
Next, we connect our Redux store to our application.
4. Connecting Redux store to our application To connect the Redux store to our application, we need to import the Provider component from react-redux and pass our store as a props to it. Then wrap our entire application in the provider component.
import store from './redux/store';
import { Provider } from 'react-redux'

const App = () => {
    return (
        <Provider store={store}>
            //...
        </Provider>
    );
};
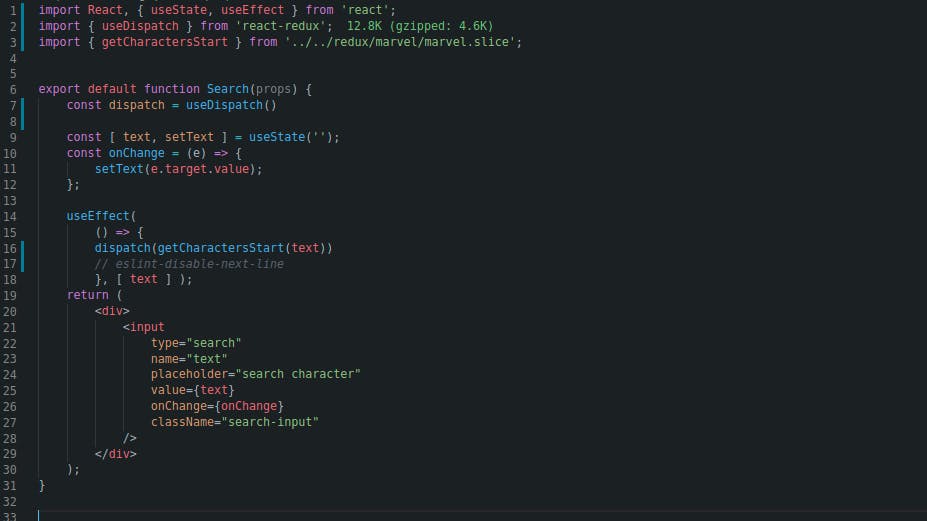
we connect our getCharactersStart action creator to the Search component which will be dispatched (using the useDispatch hooks from Redux) when the page initially render and when a user begins to search for a character
Then in the Characters Component, we will need to get the updated characters from the Redux store using the useSelector hook from Redux. We could simply use the useSelector hook this way to get the marvel slice of the state:
const { characters, loading } = useSelector((state) => state.marvel )
But we can improve performance a bit by memoizing selectors (doesn't make any tangible difference in this case though, just for demonstration purpose), so that a new instance of the selector is not created whenever the component is rendered., we use the createSelect utility function re-exported from the Reselect library for ease of use.

voila! and that's it. So we've been able to reduce how much boilerplate code we need to write ourselves when setting up Redux by using some of the utilities provided to us by the redux tool-kit. If we wanted to create another slice/sub-section of our state, let's say "users" all we will need to do is to create our user slice which will take care of handling our action types, action creators, user reducer, and setting up user sagas for handling asynchronous actions.
Redux tool-kit also provides us with two additional utilities; createAsyncThunk (A function that accepts a Redux action type string and a callback function that should return a promise) and createEntityAdapter (a function that generates a set of prebuilt reducers and selectors for performing CRUD operations on a normalized state structure containing instances of a particular type of data object. ), can come in handy when you are dealing with data in your store that is very complex and you have to normalize the data and treat your store like a database.
Thanks for reading and your feedback is welcomed!.